Wednesday 25 May 2016

Five things I learned at the Simplicity blog meet…


Faithful followers at the church of May

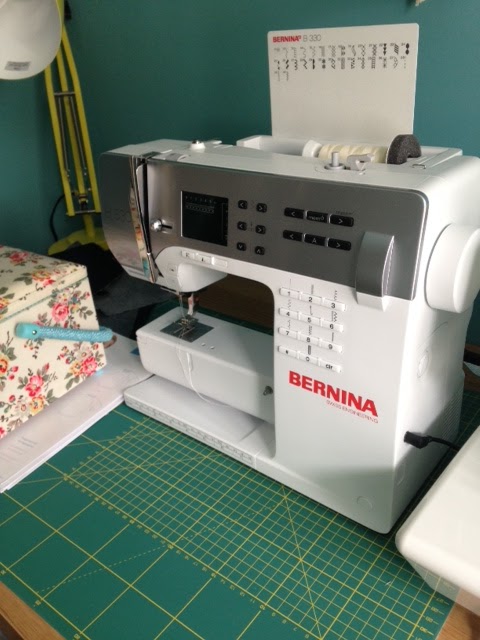
So, as you probably already know, there was an excellent Simplicity meet up in Manchester (yay the North) at the weekend. Many of the truly lovely attendees have already written up some excellent posts about what was covered on the day, so I’m not going to try and cover all of the subject matter (some great write ups by Red W Sews and Wrong Doll). But believe me, it was fantastic. The sheer amount of tips and advice that May Martin was able to cover was astounding, as was the goody bag of patterns and magazines, so a huge thank you to Hannah at Conker Comms and to Simplicity for their generosity and general brilliance.


Having had a few days to reflect (and test out some of the tips), here are my take aways from the day:

1. TV editing can be misleading: I knew from GBSB that May really knew her stuff and that she seemed like a nice person. What I didn’t expect was how much I would really, really like her - she instantly put us at our ease, had a brilliant sense of humour and made us all feel like we were all mates getting together for a bit of a chat. I honestly could have listened to her all day. I loved her passion, her stories about previous students and the frequent ‘May Mantras’, which were genius. Just a lovely, lovely lady
The joy of crotch fitting

2. Sewing is still heavily female dominated: Obviously I’m always happy to spend time with clever, creative women, but it was clear from the event that there is still a very strong female bias (no pun intended) to sewing. Yes, there are more men on the Sewing Bee than last year, but it would be fantastic to have more men participating and seeing more of their amazing skills

3. Everyone buggers it up sometime: I still have this frustration with not seeing steady improvement, and simple things causing me to get cross with certain projects, so it was a good reminder that errors still happen even to the best sewists. The main thing is to learn how to get out of those tangles with a calm and measured approach that is going to always protect your garment or project. May’s tips for when your sewing machine decides to eat your machine are going to be so useful

4. You probably already know why you are going wrong: You’ve just decided to cut some corners. We all know: use the right needle, use decent thread, read your manuals. In many cases, it might well be your machine that is causing the issue, but it was probably your choice to do something a bit faster or without the right amount of prep that is actually at fault

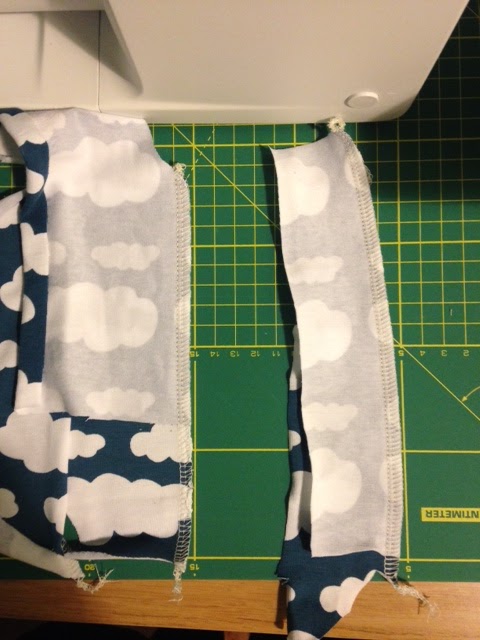
Testing out May's wisdom on differential feeds


5. Sewing people really are awesome: I’m still pretty new to the whole sewing/blogging malarky and whilst you read a lot about everyone being friendly, introducing yourself into a gang where it feels like everyone already knows each other (and knows a lot more about sewing than you) can be a bit like being the new girl who joins the sixth form. When I first walked in, there were people who already knew each other and there was that slight feeling of anxiety at knowing nobody. But in fact, all you need to do is say hello and that all immediately dissipates. Everyone is happy to chat, and I came away having finally met some people who I’ve been following for a while (and can finally rid myself of that strange stalkery feeling of knowing lots about them, but not having ever really said much about myself) and a whole load of new blogs and people to follow. Thank you everyone for being so ace.


Tuesday 17 May 2016

A Bernina Baby with a Barkcloth Bonus


It appears I’ve stayed true to my word and my latest project has been super simple, but super satisfying. I’ve seen a lot of people talk about losing their ‘sew-jo’, and whilst it seems a bit daft now, I never thought about applying it to my circumstances. Actually, it turns out it was just what I needed.

But first…the exciting development chez Knitty is my new arrival: a hefty 8kg bundle of joy in the shape of a Bernina 330. I spent many hours ploughing through online reviews and information about which Bernina would be the right investment machine for me, but I have to put all of the credit with Bamber’s, my local sewing dealer. The team there listened to what I wanted (and more importantly what I needed) and then gave me sound, sensible advice and chance to test out the various machines in my budget. No pressure at all to make a decision on the spot, but instead more than happy for me to decide in my own sweet time. 

And it was absolutely the right decision. The machine is fantastic - so quiet and smooth. I love its simplicity and useful set of utility stitches, which I will be using for the majority of projects. And not to be a total nerd, but I could watch the little bobbin filler all day. My only slight issue is that I’ve learnt way more from online videos, rather than from the manual, when I’ve come up against small problems - e.g. how to thread the twin needle so the threads don’t tangle. But, these really are tiny things, which are more than outweighed by the advantages.

Sticking to my resolution of starting small, and choosing good quality fabrics, I decided to use a material I’d been coveting online (and yes, I know that goes against my final resolution), a beautiful Cloud 9 barkcloth, to make some cushions for our living room. The material is absolutely lovely to work with, although it frays very quickly, so I overlocked everything once I’d finished sewing to make sure they’d stand up through a lot of use (and small people using them for dens…) The cushion covers themselves are simple envelope closure pieces, and there are a billion tutorials out there. 

My top tip for these would definitely be to make sure you choose really good quality cushion inserts, and make the covers fit as close to the insert measurements as possible. That means the cushions will stay plump, and they stay super comfy.


So, that’s about it. My next projects will be a wee bit more complex, but this was a nice, no pressure break, which I think I needed.

Also, in other sewing-based news, I’ll be heading out to my first ever real-life sewing event - the Big Simplicity Blog Meet on the 21st in sunny (hopefully) Manchester. Really looking forward to meeting lots of people in real life, who I have been admiring from afar for their amazing skills. Hoping that some of that will rub off on me! Are you going?


Tuesday 29 March 2016

Getting back into the groove

Hmmm, so that went quickly. So much for my resolutions of writing some kind of post every month. I could say that it’s because I’ve been so busy, but then, isn’t everyone? And I’m pretty sure in and amongst all of the time I’ve spent pootling about on t’internet between now and last September, I could have managed to write something within six months. Particularly that writing is a big part of my day job. 

So, consider this my jump back into blogging. Where it will lead and how long it will last I’ve yet to see, but enough of the excuses. There are also other plans afoot that would make it a useful exercise to at least start writing a wee bit again.

Since I last wrote, I’ve been pretty productive. There was a flurry of activity around Christmas when I managed to make a few presents, including more kids PJs - this time with added unicorns - and I made the daring, but I think pretty successful attempt to make a Ailakki jumpsuit for my work Christmas party. It stayed together for the whole night, even coping with my interesting dance moves, so that definitely warrants a success. 
There has also been knitting (whilst watching a lot of Nashville and House of Cards)

I don’t think I want to start ploughing back through things I’ve not blogged about, as I’m not sure it’s really all that interesting to look back. This would definitely be the time in the movie for some kind of montage sequence, where the things I’ve made get increasingly amazing - cue 80s soundtrack.

Partyfrockagogo

But the one thing I’ve taken away from the past six months is that that simply isn’t going to be the case. I’ve made things for both me and the girls, which have turned out pretty well (step forward the aforementioned jumpsuit and Kitschy Coo Skater Dress) but there are still things that make me want to scream in annoyance. I still struggle to sew straight, and there is often a lot of unpicking to do, either due to my failure to understand the steps properly, or my lack of patience and guessing at when comes next. There have been a couple of patterns recently where the sizing has been utterly bonkers - these I may write about in more detail, as I’m keen to find out more about where I am going wrong. Don’t get me wrong, I’m not about to give up on the whole thing - far from it - but I would love to be more confident about the things that I make. 

So, in not-at-all-timely fashion, I have decided to make some resolutions:

  1. Start small: I’m going to keep concentrating on making a few things well, rather than a whole load of stuff badly
  2. Make good fabric choices: a couple of recent projects have definitely not been helped by the quality of the fabrics I chose, all of which were impulse buys due to their price. Also, it kills me, but gazing at all the online fabrics is also not helping. For now I’m sticking to visiting shops in person, and attempting to only pick good quality cloth
  3. Put this all to some good use: I’m not sure what this will be yet, but there is some thinking to be done.
  4. And finally, take the plunge and send my old creaking machine to the dealer in the sky. I’ve been saving up for a while, and am almost ready to invest in a machine that will last for a long time to come. Any recommendations? Am very tempted to go down the Bernina route…


So, that is that. Let’s see what happens from now on!

Tuesday 1 September 2015

(Mis)adventures in jersey…


… or how I realised I will always be the one following a pattern. I knew from the start that there were going to be problems. The idea of improvising fills me with dread. I am always the one who likes to follow instructions, and if I carry them out well, I’m pretty happy. That whole thing of going with the flow and things then unexpectedly turning out brilliantly just doesn’t work for me. It normally ends in a dodgy end result.

I had a couple of great pieces of knit fabric - one with mermaids on from our recent trip to Holland, and one half metre piece of stripes from my mum’s first failed attempt at buying fabric online. To be fair I should have forewarned her about the whole FQ/metre check: this is a woman who still starts all her Google searches with www.

Rigorous PJ testing chez Knitty
The girls both needed summer PJs, and as luck would have it, my MIL gave me her latest Prima pattern which included a girl’s skort. That bit was fine, the pattern is really simple, so the undershorts quickly became the bottoms for the PJs. I’m still contemplating an overlocker, and this project did make me wish for one, as the pinked seam edges do curl a little bit. 

To make the vest tops, I took one of Girl 1’s RTW tops and traced, adding seam allowance, and feeling fairly smug that this would look awesome. I added bindings to the armholes and neck, and I think that’s where it all went wrong. Guesswork is definitely not my friend and I ended up with a titchy tight top. Luckily I have a Girl 2 that it fits perfectly, so with a bit of adjustment, I managed to make a second, bigger top. And judging by the pics, they seem to both like them…

Perhaps somewhat stupidly, I then moved onto the stripy fabric with the idea of making a summer dress for Girl 1. She is almost allergic to trousers, so I figured this would be a useful addition to her wardrobe. Using the bigger template of the PJ vest I drew out a longer dress, which I thought I would cinch in with an elastic waistband. It took about three attempts to get it all even - I think there was just way too much fabric in there versus the waistband stretch. 

My first and probably last attempt at non pattern drafting
I tried a new way of attaching arm and neck hole edgings where you fold the strip and zigzag it to the edging. I liked this a lot, but the edgings do seem to stick out a bit now. I also think I made the mistake of getting Girl 1 to try on the dress before the edgings went on, because the neckline seems way out of shape and I think we stretched it as she tore it off to get on with something more exciting. So far, this one seems to be staying in the closet, so not the biggest success. Anyone have any advice on how I could improve on this disaster?

The neckline of doom

It’s pretty safe to say that I’ll be sticking to patterns from now on, maybe with some minimal alterations from my side. It’s clear that I am never going to be a designer!!!!! 


Tuesday 28 July 2015

My first attempt at curtains

Hello again! It's been a while! So much for my good intentions for keeping this blog up to date, but to be honest, there's not been a huge amount to report on.

We've been busy doing up my office room which will not only house me and my laptop on my working from home days, but will also become a dedicated place for my sewing machine to sit. At the moment I end up dragging the machine and all of its associated gubbins downstairs once the small ones are in bed in order to get a bit of a project done. This inevitably ends up with me managing to do about 90 minutes sewing on a good night, before other jobs call me away, or Mister Knitty declares it to be Breaking Bad on Netflix time. The latter is no bad thing, because i. Breaking Bad is our new obsession (yes we are very late to the game) and ii. I get to continue with my knitting WIP, the beautiful Northmavine hoodie by Kate Davies. I'm loving the colours in this pattern and also working with the beautiful Shetland yarn again.

But whilst my lair of sewing joy is still in progress, I've been trying to finish a couple of projects at either end of the sewing spectrum in terms of size and scale. First up: curtains for the lounge.


Sewing on a grand scale

I'm sure there are a billion tutorials on curtain making - actually, I know there are a billion tutorials, as I waded through heaps of them. So I am not going to even attempt to add to that. Instead, a few things that I learnt during making mine:

1. Choosing a busy print is a great idea if you can't be bothered matching: I did take a look at whether I could match up the pattern on the fabric we chose (Ester from Scion), but there is so much going on that it makes no real difference. A lot of curtain fabrics are so expensive, the last thing you want to be doing is scrapping a whole lot just to get a match when you don't need it
Busy pattern for a lazy sewist
2. Straight lines with such huge seams is not fun. I am not particularly good at staying straight even with small projects, so I knew this would end up a little wonky. Marking with chalk along the pattern line did help a lot

3. Let the curtains hang a little before hemming. This helps to resolve any wonkiness achieved in point 2. Once they've settled, it's quite easy to pin up a fairly neat hem to make sure it matches up

This project also helped me to practice some hand hemming, which I loved doing. Normally I loathe hemming and it always looks appalling, but I am really pleased with the finish of these.

Handhemming FTW


Wednesday 17 June 2015

Brooklyn Tweed Atlas for Little Knitty 1

I absolutely adore Brooklyn Tweed's designs, and when I saw the Atlas pattern in last year's kids' collection, I knew it was one for me. Beautiful colours, fair isle-style yoke, sweater and cardigan options. All boxes ticked.


Next choice: yarn. I'd recently bought some Debbie Bliss Rialto DK in a sale somewhere, thinking that it would definitely end up as something for one of the girls. I thought it would be suitable in terms of weight, but it would lose some of the aran feel of the Brooklyn Tween yarns that are recommended. I still can't wait to knit with some of those. I matched this bright blue up with a couple of balls from my stash. The pattern suggests that the child could pick out the yarn colours, but to be honest we would have been stuck with some very random choices, so I did kind of wave them at her and then carried on regardless.

The pattern is very easy to follow and I learned some very neat little techniques for a provisional cast on, and even the method for picking up stitches without leaving gaps is something I'll use from now on. Others on Ravelry have mentioned that the short rows aren't particularly essential. I'm not too sure, but I still struggle with keeping my stitch markers at the right position, so hopefully mine aren't too wonky.

The colour chart is very clear, and I like that on each row, it's set out which yarn should be dominant. I probably shouldn't say this, but I actually thought that it didn't matter which yarn went where. I know, I should be stripped of my needles. It was a real eye opener for me to see the texture that came through when I actually followed the instructions properly. I know. Lesson learnt.

And then, of course, there's the steek. I've done one previously for my Little Birds cardigan, and I remember that I wasn't nervous at all, just excited. This one would have been simple, however for some reason my steek seemed to shift around (looks as though those short rows weren't that accurate), so I decided to machine stitch two rows to make sure that the steek was properly secure before cutting. Everything has stayed where it needed too, but the yarn is quite smooth, so it's not going to felt in as much as more aran-type yarns would do. So, I'm not too keen on the messy interior, but I made sure the button bands were nice and wide to make sure it's all hidden away.


I am really pleased with how this one turned out, but as always when knitting for small ones, it's always a worry that the garment you've just spent weeks and months slaving over is stuffed into a drawer and forgotten about. But judging by the pics, I don't think that will be the case for this one.

I think she likes it

Wednesday 27 May 2015

Simplicity Blogger Challenge: Practical Picking Up Pockets Skirt

Well, the good news is that my sewing machine is now back from the dealers, which is awesome. The bad news is that they basically told me that they can’t do anything for it (I felt like I was in some bad daytime hospital drama), and that I should basically run it until it breaks and then put the money I would have spent repairing it towards a new machine. 

Skirt and slippers: the best combination
So, it may be squeaking a little, but it’s managed to keep going long enough for me to finish my entry for the Simplicity Blogger Challenge. When I first saw the competition, I had literally just started with the whole blogging thing, so I thought it was serendipitous timing. It was lovely to get an email back from the Simplicity team and get the pattern in the post.

And then the worries kicked in. I’ll be totally honest, I was really worried about the whole customising and embellishment part. It’s the bit in the Sewing Bee that always fills me with dread, and I’m pretty certain that if ever in that position, I would panic, go totally over the top and the whole thing would look like a very bad day in a Home Ec classroom. 

But then I started to think more about how I could make my skirt practical and suited to my style and my life. First things first: I would need to seriously lengthen it! The pattern pieces looked super short, which is no bad thing, but I knew it would be more my style in a longer length. This was a simple enough process, although I managed to slice through the oilcloth on our dining room table in a ‘missing the cutting mat’ incident…yeah, try explaining that one away to the family the next morning…

Lengthening the skirt panels, with some fruity improvised weights

For another practical reason, I decided on View C with patch pockets. With two small Knitties in the house, I constantly find myself picking up random toys, pencils, dinosaurs, counters from various rooms, and stick them in my pockets to transport them back to their rightful places. I am basically a walking version of The Stairs rule. So, massive pockets were a definite yes.

The fabric is a fantastic medium-to-heavyweight cotton from a recent trip to London where I snuck in a trip to Goldhawk Road and its frankly amazing array of fabric shops. When I lived in London after university, I was literally 100m from this, but I didn’t sew, so never went in. Tsk. Anyway, I loved the pattern and thought it would have enough oomph (technical term there) to make the most of the volume in the gathers.

With a bit of measuring and a bit of luck, the pockets seem to be on fairly straight, which was one of my main concerns, as any wonkiness would be pretty obvious. I thought the little facings, where you turn out the tops to make a neat edge were a neat little finish. 


When it came to the gathers, I decided to do three lines of running stitch, as I remember reading that it can make the process much more stable, and I have to say it did make it an easy job. I was surprised how loose I needed to make the gathers to fit the waistband - I’d envisioned loads of material squiged into the waist, but it’s a much neater line.

Three lines good

I knew I wanted to make the bottom edge a bit more interesting, and I was reminded of one of my very favourite RTW skirts, which has a pleated bottom. I’ve never really attempted pleats, but I thought if I pinched up each pleat, pressed and sewed three lines of neat stitching to strengthen each pleat, it would make a smart, but not too home-eccy finish. Although sewing in a straight line is definitely not one of my strong points, I’m pretty happy with the effect. 


I am so pleased with how this has turned out and I will definitely be wearing this heaps. It’s super comfy for working from home (as well as the ongoing collecting of small people’s random treasures from about the house), but smart enough to get out for the school run. I’ve also loved seeing everyone else’s entries and there are some really fantastic ideas that I will be trying out with my next versions!